In our previous journey into the world of home fermentation, we unlocked the secrets of making traditional sauerkraut, a classic and beloved staple in the fermenting community. We dove into the basics of vegetable fermentation, exploring the transformative process where natural bacteria turn simple ingredients into flavorful, probiotic-rich foods. Through the art of fermenting cabbage, we learned the importance of creating an anaerobic environment, the role of salt in preservation, and the joy of tasting our very own homemade ferment.
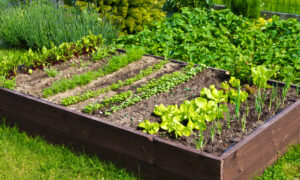
But the world of vegetable fermentation is vast and diverse, stretching far beyond the realms of sauerkraut. In this article, we’re going to broaden our fermentation horizons, turning our attention to other garden favorites: carrots, beets, and cucumbers. Each of these vegetables brings its unique textures and flavors to the fermenting table, offering a canvas for culinary creativity and experimentation.
Fermentation is not just a method of preservation; it’s a gateway to a world of complex flavors and health benefits. By introducing different spices and herbs into our ferments, we can tailor the taste profiles to our liking, creating bespoke batches of fermented goodness. Whether you crave the spicy kick of ginger in your fermented carrots, the earthy depth of juniper berries in your beets, or the classic dill and garlic combination in your pickles, the possibilities are as limitless as they are delicious.
So, let’s embark on this flavorful adventure, expanding our fermentation skills and palates. We’ll explore how to ferment these vegetables, play with spices to enhance their natural flavors, and perhaps even discover our new favorite fermented food. Grab your jars and spices, and get ready to transform your kitchen into a fermentation wonderland!
In This Article
Section 1: The Basics of Vegetable Fermentation
In our exploration of fermenting sauerkraut, we touched upon some key principles of vegetable fermentation. These foundations apply universally, whether you’re fermenting cabbage, carrots, beets, or cucumbers. Understanding these basics is crucial for successful fermentation, resulting in delicious and safe-to-consume products.
Fundamental Principles of Vegetable Fermentation
- Anaerobic Environment:
- The essence of vegetable fermentation lies in creating an anaerobic (oxygen-free) environment. This factor is crucial for encouraging the growth of beneficial bacteria while inhibiting harmful ones. Submerging vegetables under a brine or using airtight containers helps achieve this.
- The Role of Beneficial Bacteria:
- Fermentation is driven by lactobacillus bacteria naturally present on the surface of vegetables. These bacteria convert sugars and starches in the vegetables into lactic acid, a natural preservative that inhibits the growth of harmful bacteria.
- Controlled Fermentation Process:
- The fermentation process is influenced by factors such as temperature, time, and the salt concentration in the brine. These factors need to be balanced to create the perfect conditions for fermentation.
Importance of Fresh, Organic Produce
- Quality of Ingredients:
- The quality of the vegetables you choose will play a significant role in the outcome of your fermentation. Fresh, organic produce is ideal as it’s free from chemicals and pesticides that can interfere with the fermentation process and the health benefits of the final product.
- Rich in Natural Bacteria:
- Organic vegetables are likely to have a more diverse and robust population of natural bacteria, which can lead to more successful and flavorful fermentations.
The Role of Salt and Water Quality
- Salt:
- Salt is crucial in vegetable fermentation. It helps draw out moisture from the vegetables, creating a brine that submerges and protects the produce. The right amount of salt inhibits the growth of unwanted bacteria while also promoting the growth of beneficial lactobacillus bacteria.
- It’s important to use non-iodized salt, as iodine can inhibit bacterial growth.
- Water:
- If you’re making a brine, the quality of the water is just as important as the quality of the salt. Chlorinated tap water can kill the beneficial bacteria necessary for fermentation. Using filtered or spring water is recommended.
By adhering to these fundamental principles, you will ensure a successful and safe fermentation process. Whether you’re a seasoned fermenter or a curious novice, these basics are your guide to exploring the vibrant world of vegetable fermentation.
Section 2: Fermenting Different Vegetables – Carrots
Carrots: A Vibrant and Flavorful Choice for Fermentation
Carrots are a popular choice for fermentation due to their natural sweetness and crisp texture. When fermented, carrots transform into a tangy, flavorful snack or side dish that’s not only delicious but also packed with probiotics.
Preparing Carrots for Fermentation
- Selecting Carrots:
- Choose fresh, firm carrots. Organic carrots are preferable as they are pesticide-free and often have a better natural bacterial presence for fermentation.
- Cleaning and Cutting:
- Thoroughly wash the carrots. Peeling is optional; however, if the carrots are not organic, peeling is recommended to remove any residual pesticides.
- Cut the carrots into sticks or rounds, depending on your preference. Consistent size helps in even fermentation.
- Creating the Brine:
- Prepare a brine solution using non-iodized salt and filtered water. A general rule is to use 2-3% salt by weight of the water. For a crunchier texture, a higher salt concentration can be used.
Fermentation Process
- Spicing Up the Carrots:
- Before adding the carrots to the jar, consider adding spices to enhance their flavor. For carrots, dill, garlic, and ginger work wonderfully.
- Add a few sprigs of dill, a couple of cloves of peeled garlic, and a few slices of fresh ginger to the jar.
- Packing the Jar:
- Tightly pack the carrot sticks or rounds into the fermentation jar. Pour the brine over the carrots, making sure they are completely submerged.
- Weight and Seal:
- Use a fermentation weight to keep the carrots submerged under the brine. Seal the jar with an airlock lid or a standard lid if burping the jar daily.
- Fermentation Time:
- Store the jar at room temperature and away from direct sunlight. Fermentation time can vary based on temperature and your taste preference but generally ranges from 5 days to 2 weeks.
- Taste and Store:
- Start tasting the carrots after 5 days. Once they’ve reached your desired level of tanginess and crunch, move them to the refrigerator to slow down the fermentation.
Tips for Fermenting Carrots
- If you notice a white film (kahm yeast) on top of the brine, it’s generally harmless. Just skim it off. If it has an off smell or mold, discard the batch.
- The spices can be altered according to taste. Experimenting with different spices can lead to exciting flavor combinations.
Fermenting carrots is not only an easy way to start exploring the world of fermented vegetables but also a delightful way to add a probiotic-rich, flavorful twist to your meals.
Fermenting Different Vegetables – Beets
Beets: Rich in Color and Flavor for Fermentation
Beets are a fantastic choice for fermentation, not just for their earthy sweetness but also for their vibrant color. They can be transformed into a tangy, visually striking addition to any meal. However, beets require a bit more attention during the fermentation process to avoid over-fermentation, which can lead to too strong or unpalatable flavors.
Preparing Beets for Fermentation
- Choosing Beets:
- Select fresh, firm beets. Generally, smaller beets are sweeter and more tender, ideal for fermentation.
- Cleaning and Cutting:
- Clean the beets thoroughly. Peeling is optional; however, peeling can help remove any dirt or residue on the skin.
- Cut the beets into thin slices or small cubes. This process ensures they ferment evenly and are easy to eat.
- Brine Preparation:
- Prepare a brine solution as done with carrots, using non-iodized salt and filtered water.
Fermentation Process
- Flavor Pairings:
- Beets pair beautifully with warm spices like juniper berries, cloves, and cinnamon. These particular spices can complement the natural sweetness of the beets.
- Place a few juniper berries, a couple of cloves, and a small stick of cinnamon in the fermentation jar before adding the beets.
- Packing the Jar:
- Place the beet slices or cubes in the jar, packing them tightly.
- Pour the prepared brine over the beets, ensuring they are fully submerged.
- Weight and Seal:
- Use a fermentation weight to keep the beets under the brine. Seal the jar with an airlock lid or a standard lid, remembering to burp it daily if using the latter.
- Monitoring Fermentation:
- Beets can ferment faster due to their high sugar content. Start checking them after 3-4 days.
- Taste the beets periodically. Once they reach a balance of tanginess and sweetness that you enjoy, transfer them to the refrigerator.
Tips for Successful Beet Fermentation
- Be mindful of the beet’s natural sugars, which can lead to rapid fermentation. Regular tasting is key.
- The brine may take on the color of the beets, turning a deep red. This process is normal and part of the visual appeal of fermented beets.
- If the beets develop a film or mold, skim it off if it’s just kahm yeast. If you’re unsure or if the smell is off, it’s safer to discard the batch.
Fermented beets, with their unique flavor and striking appearance, make a wonderful addition to salads, side dishes, or even as a standalone snack. Their rich, earthy flavor, enhanced with the warmth of selected spices, can be a real treat for the taste buds.
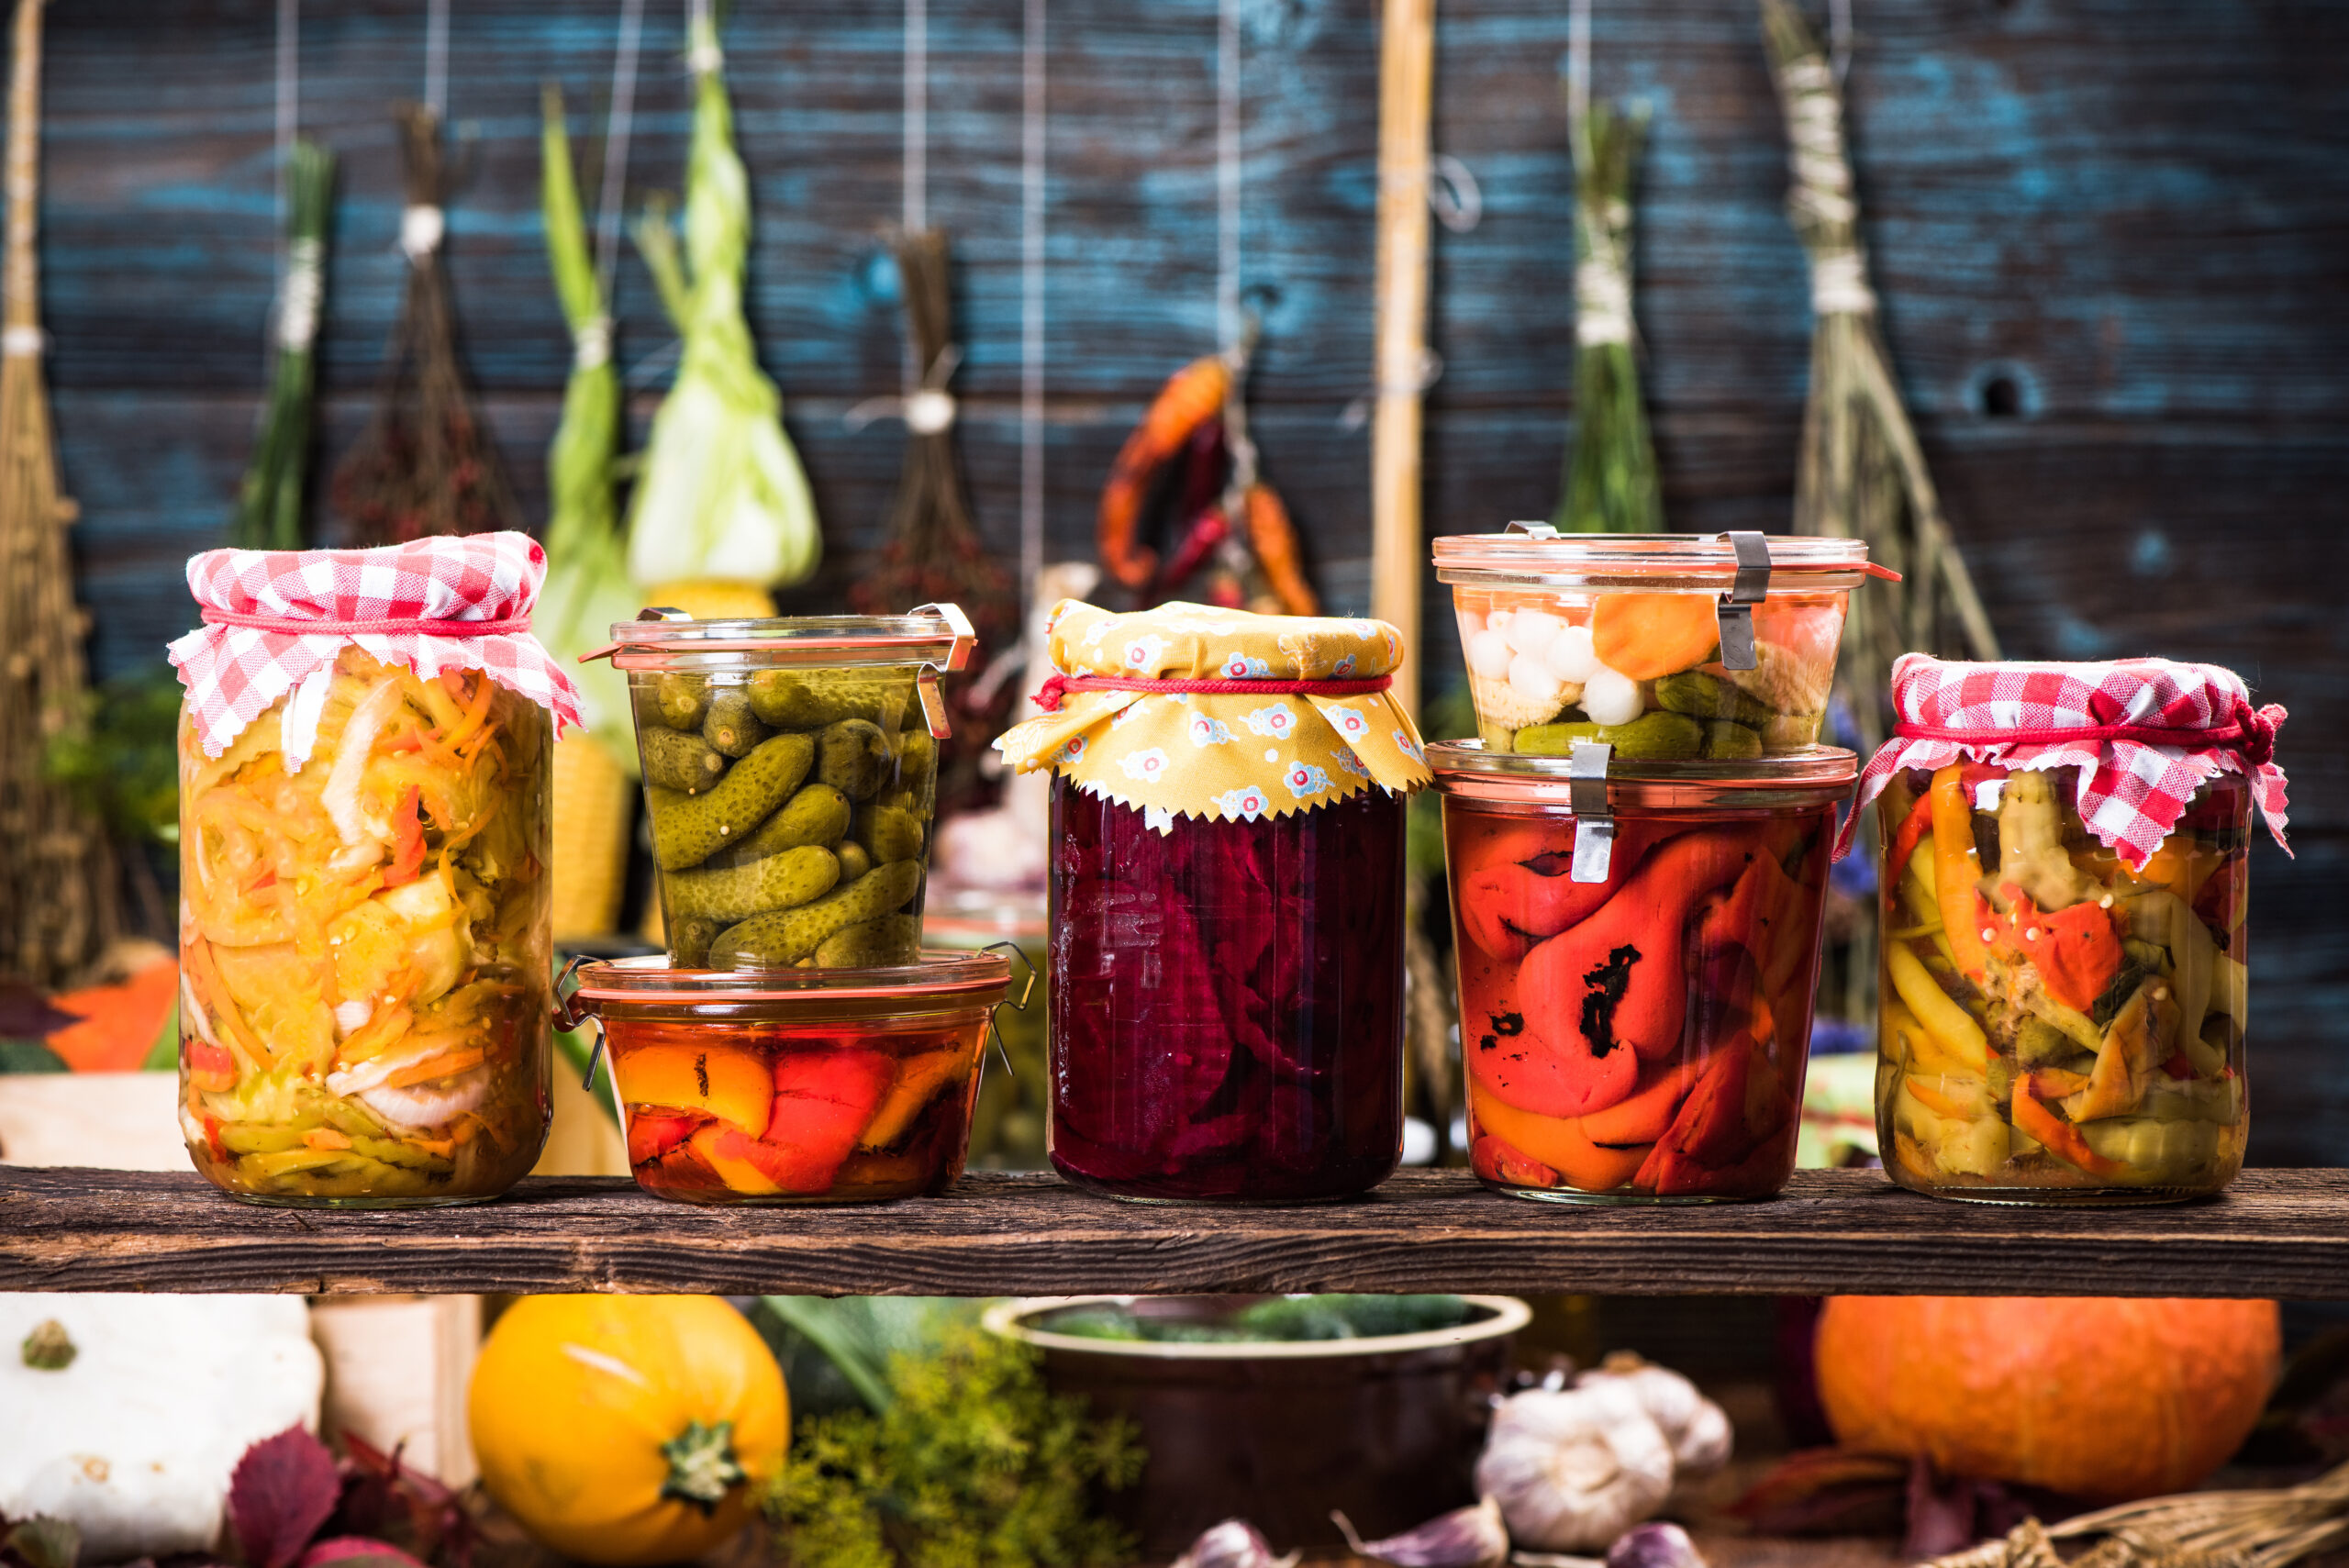
Fermenting Different Vegetables – Cucumbers
Cucumbers: Creating Classic Fermented Pickles
Cucumbers are perhaps one of the most popular vegetables to ferment, known widely as pickles. Fermented cucumbers are crunchy and tangy and can be customized with a variety of spices. Unlike the vinegar-based pickles commonly found in stores, naturally, fermented pickles are rich in probiotics and have a complex flavor profile.
Preparing Cucumbers for Fermentation
- Selecting Cucumbers:
- Choose small to medium-sized cucumbers, preferably of the pickling variety. These cucumbers have thinner skins and fewer seeds, making them ideal for fermentation.
- Cleaning and Preparing:
- Wash the cucumbers thoroughly. Remove a tiny slice from the cucumber’s blossom end; it may contain enzymes that soften pickles.
- You can leave the cucumbers whole, slice them into spears, or cut them into rounds, based on your preference.
- Brine Solution:
- Similar to other vegetables, prepare a brine with non-iodized salt and filtered water. The brine concentration can be around 3-5% for pickles.
Fermentation Process
- Spice Suggestions:
- Classic spices for pickles include mustard seeds, black peppercorns, and fresh dill. These add a lovely aromatic flavor to the cucumbers.
- Place the spices at the bottom of the jar before adding the cucumbers. You can also add garlic cloves or chili peppers for extra flavor.
- Packing the Jar:
- Pack the cucumbers tightly into the jar. Pour the brine over the cucumbers; be sure they are fully submerged.
- Weight and Seal:
- Use a fermentation weight to keep the cucumbers under the brine. Close the jar with an airlock lid or a regular lid if you plan to burp it daily.
- Fermentation Duration:
- Ferment the cucumbers at room temperature. Start tasting them after about 5 days. The perfect fermentation time varies, but it typically takes around 1-2 weeks.
- Storage:
- Once the pickles reach your desired level of sourness and crunch, transfer them to the refrigerator to slow further fermentation.
Tips for Perfect Fermented Pickles
- Ensure the cucumbers stay submerged to prevent mold and spoilage.
- If you notice any scum on the surface of the brine, remove it—it’s typically harmless but can affect flavor and appearance.
- The fermentation time frame may differ depending on the temperature and size of the cucumbers. Regular tasting is the best way to determine when they’re ready.
Fermented cucumbers, or classic pickles, are a delightful way to enjoy the benefits of fermentation. They’re perfect as a snack, in sandwiches, or as a side to any meal. The crunchy texture and tangy flavor, enhanced with your choice of spices, make them a favorite in any fermenter’s kitchen.
Section 3: Exploring Flavors and Spices in Fermentation
The Art of Flavor Enhancement with Spices
Spices play a pivotal role in fermentation, transforming simple vegetables into culinary delights with complex flavors. The right merging of spices can elevate the taste, add depth, and introduce a unique character to each batch of fermented vegetables.
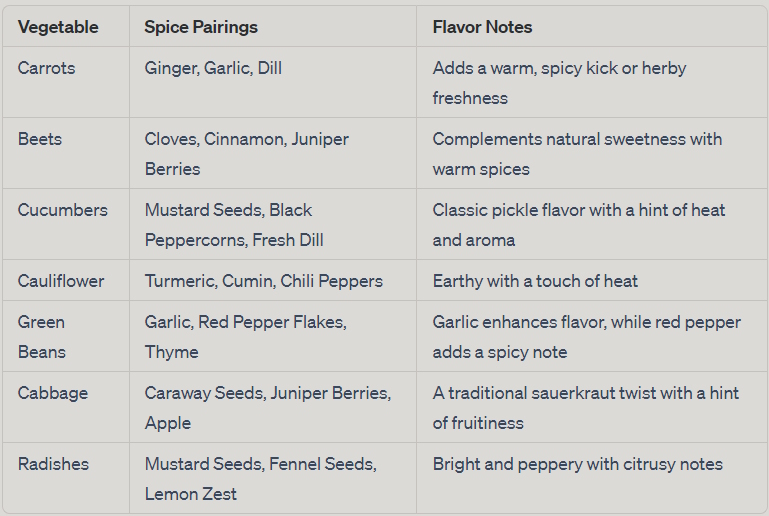
Pairing Spices with Vegetables
Here’s a handy guide to some classic and innovative spice and vegetable pairings:
Impact of Fermentation Time on Flavor
The duration of fermentation affects not only the texture and probiotic content of the vegetables but also their flavor profile. A shorter fermentation period typically results in a milder flavor, retaining more of the vegetable’s original taste. As fermentation progresses, the flavors deepen and become more complex. Spices also evolve during fermentation; some may become more pronounced, while others meld seamlessly into the background.
- Short Fermentation (3-5 days): Ideal for a subtle, fresh flavor. Spices will be more distinct, and individual flavors will be more discernible.
- Medium Fermentation (1-2 weeks): Creates a balanced blend of spice and vegetable flavors with a noticeable tangy taste.
- Long Fermentation (3 weeks and beyond): Leads to robust, complex flavors where spices and vegetables marry into deep, rich profiles.
Experimenting with Spice Combinations
Feel free to experiment with various spice combinations. The beauty of home fermentation is the ability to tailor each batch to your personal taste. Consider starting with small test batches to explore how different spices interact with each vegetable over various fermentation periods.
Section 4: Creative Combinations and Recipes in Vegetable Fermentation
Unleashing Creativity with Unique Combinations
Fermentation is a playground for culinary creativity. By experimenting with different vegetables and spice combinations, you can craft unique flavors that cater to your palate. Let’s explore some inventive pairings and provide recipes to get you started.
1. Spicy Fermented Carrots Recipe
Ingredients:
- Fresh carrots, peeled and sliced
- 1-2 teaspoons of red pepper flakes (adjust to taste)
- 1 teaspoon of mustard seeds
- 2 cloves of garlic, minced
- Brine (3% salt solution)
Method:
- Prepare your carrots and pack them into a clean fermentation jar.
- Add the red pepper flakes, mustard seeds, and minced garlic to the jar.
- Cover with brine, ensuring the carrots are fully submerged.
- Seal with a fermentation weight and lid, and ferment at room temperature for about 1 week.
- Taste and, if satisfied, transfer to the refrigerator.
2. Sweet and Sour Fermented Beets Recipe
Ingredients:
- Fresh beets, peeled and thinly sliced
- 1 cinnamon stick
- 2 cloves
- A few slices of fresh ginger
- ½ cup apple juice (for natural sweetness)
- Brine (2% salt solution)
Method:
- Place the sliced beets in a fermentation jar.
- Add the cinnamon, cloves, and ginger.
- Mix in the apple juice; then add the brine to cover the beets.
- Use a fermentation weight to keep beets submerged.
- Ferment @ room temperature for about 2 weeks, tasting periodically.
- Once the desired flavor is achieved, store it in the refrigerator.
Encouraging Personal Experimentation
These recipes are just starting points. The real joy of fermentation is in the experimentation. Try combining different vegetables in the same jar or using a spice you’ve never tried before. The possibilities are endless. Here are a few ideas to spark your creativity:
- Garlic and Dill Green Beans
- Turmeric and Black Pepper Cauliflower
- Lemon Zest and Rosemary Radishes
Tips for Experimentation:
- Start with small batches to test flavors.
- Keep notes on your experiments, including the types of vegetables, spices, brine concentration, and fermentation time.
- Remember, every batch is a learning opportunity, and unexpected combinations can lead to delightful discoveries.
Section 5: Health Benefits of Diverse Fermented Vegetables
Nutritional Powerhouse of Fermented Vegetables
Fermentation isn’t just a method to enhance the flavor and shelf-life of vegetables; it significantly boosts their health benefits. This age-old practice not only preserves the nutrients in vegetables but also enhances them, making fermented vegetables a nutritional powerhouse in your diet.
Enhanced Nutritional Value
- Increased Bioavailability of Nutrients:
- Fermentation converts nutrients into more easily digested forms. For example, the bioavailability of minerals like iron and zinc is increased in fermented foods, making it easier for your body to absorb them.
- Boost in Vitamin Content:
- The fermentation process can increase levels of certain vitamins, especially B vitamins. For instance, fermented cabbage in the form of sauerkraut is rich in vitamin B12, a vital nutrient especially important for vegetarians and vegans.
- Natural Probiotic Source:
- Fermented vegetables are a natural source of probiotics (the helpful bacteria that play a crucial role in your gut health). A healthy gut is associated with better digestion, a more powerful immune system, and improved mental health.
Diversity of Probiotic Strains and Nutrients
Each type of vegetable brings its unique mix of nutrients and probiotic strains to the fermentation process:
- Cabbage (Sauerkraut and Kimchi):
- Rich in vitamin C, K, and B6, and a good source of lactobacillus strains that aid in digestion.
- Carrots:
- High in beta-carotene, fiber, and vitamin K. Fermentation enhances the bioavailability of these nutrients.
- Beets:
- Packed with folate, manganese, and fiber. Fermentation can increase the levels of certain antioxidants found in beets.
- Cucumbers (Pickles):
- Contains vitamins K and A, and antioxidants. Fermentation adds beneficial bacteria, enhancing their health profile.
- Diverse Vegetables:
- Using a mix of vegetables in fermentation can introduce a wider range of probiotics and nutrients. For example, fermenting a mix of radishes, turnips, and carrots can create a synergistic blend of vitamins, minerals, and probiotics.
Enhanced Digestibility and Immune Support
- Fermented vegetables are easier to digest, as the fermentation process breaks down hard-to-digest cellulose in vegetables.
- The probiotics in fermented foods are known to support the immune system, making them a great addition to a health-conscious diet.
Conclusion: A Holistic Approach to Health
Including a variety of fermented vegetables in your diet isn’t just about flavor; it’s a holistic approach to enhancing your overall health. By combining different vegetables and fermentation methods, you can create a diverse microbial ecosystem in your diet, contributing to better gut health and overall well-being.
Section 6: Tips for Successful Fermentation
Creating the Optimal Fermentation Environment
To ensure successful fermentation, it’s crucial to establish and sustain an environment suitable for the growth of beneficial bacteria. Here are some key tips:
- Consistent Temperature:
- Most vegetable fermentations thrive at room temperatures between 65°F and 75°F. Extreme temperatures can hinder fermentation or encourage the growth of unwanted bacteria.
- Avoiding Direct Sunlight:
- Place your fermenting vegetables in a spot that’s away from direct sunlight. Light can affect the temperature and potentially harm the beneficial bacteria.
- Proper Airflow:
- While an anaerobic environment is essential inside the jar, the area around the jar should have good airflow. This helps in maintaining a stable temperature and preventing off-flavors.
Addressing Common Challenges
Each vegetable may present its own set of challenges during fermentation. Here are some common ones and how to address them:
- Carrots and Beets:
- They can sometimes become too soft. To maintain crunchiness, ensure a sufficient salt concentration in the brine and check the vegetables regularly.
- Cucumbers (for pickles):
- They can quickly turn mushy. Use grape, oak, or horseradish leaves, which contain tannins that help keep pickles crisp.
- Cabbage (for sauerkraut):
- Ensure it’s well packed in the jar to eliminate air pockets, which could lead to improper fermentation.
Troubleshooting Tips
- Mold Formation:
- A small amount of white film on the surface is often just kahm yeast, which is generally harmless but can impart an off-flavor. Skim it off. Colorful molds (such as green or black) indicate deterioration, and the batch should be discarded.
- Improper Fermentation:
- If your vegetables aren’t fermenting (not becoming tangy), it could be due to too much salt, too low temperature, or inadequate bacterial cultures. Ensure correct salt ratios and room temperature. Using a starter culture from a successful batch can help.
- Over-Fermentation:
- If the vegetables become too soft or the flavors too strong, they may be over-fermented. To avoid this, taste your ferment regularly and transfer it to the refrigerator once it reaches the desired stage.
Final Notes for Success
- Always use clean, sterilized jars and equipment to prevent contamination.
- Be patient and let the fermentation process take its natural course.
- Keep detailed notes of your recipes, including vegetable types, spices, salt concentrations, and fermentation times, for future reference and improvement.
Conclusion: Embracing the World of Vegetable Fermentation
As we bring our exploration of fermenting diverse vegetables to a close, it’s clear that the world of fermentation is rich with possibilities. From the crisp tanginess of fermented cucumbers to the earthy sweetness of beets, each vegetable offers a unique canvas for culinary creativity. The simple act of combining water, salt, vegetables, and spices can transform ordinary ingredients into something extraordinary – full of complex flavors and beneficial probiotics.
The journey into vegetable fermentation is one of endless discovery. Each batch you create is an opportunity to experiment, learn, and enjoy the fruits of your labor. Whether you’re savoring the crunchy zest of your homemade pickles or the robust flavors of your spicy fermented carrots, you’re part of a tradition that dates back thousands of years, connecting cultures and generations.
But our fermentation adventure doesn’t end here. In future articles, we’ll dive even deeper, exploring advanced fermentation techniques, uncovering the secrets of international fermentation methods, and perhaps even combining the old with the new to create something uniquely our own. The possibilities are as boundless as your curiosity and creativity.
So, I encourage you to keep experimenting, keep tasting, and keep exploring the vast and vibrant world of fermentation. Share your successes and your learning experiences, and remember that every batch, no matter the outcome, is a step forward in your fermentation journey.
Stay tuned for more fermenting adventures, where we’ll unlock even more secrets of this ancient art, bringing the flavors of the world right into your kitchen. Happy fermenting!