Fermentation: it’s an age-old culinary art that’s as fascinating as it is flavorful. At its core, fermentation is a natural process that involves microorganisms like yeast and bacteria and converts carbohydrates, starches, and sugars — into alcohol or acids. This transformation preserves the food and creates rich, complex flavors and an array of health benefits. The magic of fermentation lies in its simplicity and the delightful unpredictability of its outcomes.
Historically, fermentation has been a cornerstone in many cultures’ food preservation techniques. Long before refrigeration, our ancestors relied on this method to keep their food edible and nutritious for extended periods. From the tangy sauerkraut of Germany to the spicy kimchi of Korea, fermented foods have graced dining tables across the globe, each with its unique taste and tradition.
In today’s culinary world, fermentation is experiencing a renaissance among home cooks and professional chefs alike. It’s celebrated not just for its ability to extend the shelf life of food but for the depth of flavor and health benefits it brings. Home fermentation has become a symbol of the culinary DIY movement, empowering individuals to take control of what they eat, explore new flavors, and reconnect with ancient food traditions.
In this beginner’s guide, we’ll journey into the world of home fermentation. We’ll discover its benefits, understand the basic principles, and even start our first fermentation project. So, let’s embark on this flavorful adventure and unlock the secrets of this timeless culinary art!
In This Article
Benefits of Fermentation
1. Health Benefits: The Power of Probiotics
One of the most celebrated benefits of fermented foods is their rich content of probiotics — beneficial bacteria that play a crucial role in your digestive health. These living microorganisms, often referred to as “good bacteria,” help balance the gut flora, which is essential for optimal digestion, nutrient absorption, and a strong immune system. Regular consumption of fermented foods like yogurt, kefir, sauerkraut, and kimchi can lead to an improved gut microbiome, which is linked to numerous health benefits, including enhanced digestive function, reduced inflammation, and an even a lower risk of certain chronic diseases.
Fermentation will also increase the nutritional value of food. This process can enhance the levels of certain nutrients, like B vitamins, and make minerals more bioavailable, meaning that your body can absorb them more easily. Moreover, fermentation breaks down compounds that can interfere with nutrient absorption, such as phytic acid found in grains and legumes.

2. Environmental Advantages: A Sustainable Choice
Fermentation is not just good for our health; it’s also beneficial for the environment. This ancient technique is a natural and energy-efficient way to preserve food, requiring minimal processing and no artificial preservatives. By extending the shelf life of all perishable items, fermentation helps reduce food waste, a significant issue in modern societies. In a world where a substantial portion of food is thrown away, fermenting provides a practical solution to conserve food resources and minimize waste.
Furthermore, fermentation often utilizes whole food ingredients and can be done at home, cutting down on packaging and transportation emissions associated with commercially processed foods. It encourages the use of local and seasonal produce, supporting sustainable agricultural practices. For individuals who are interested in reducing their carbon footprint, incorporating fermented foods into their diet is a delicious and effective way to contribute to environmental conservation.
Fermenting Dairy: Making Yogurt and Kefir at Home
Making Homemade Yogurt
Yogurt-making is a delightful and surprisingly simple process. It involves fermenting milk with specific cultures (Lactobacillus bulgaricus and Streptococcus thermophilus) that transform the milk’s natural sugars into lactic acid, giving yogurt its distinctive tang.
Steps:
- Heat the Milk: Start by heating your choice of milk (cow, goat, or plant-based) to about 180°F. This step alters the milk protein structure, ensuring a smooth and creamy yogurt.
- Cool the Milk: Wait for the milk to cool down to about 110°F, the ideal temperature for the cultures to thrive.
- Add the Cultures: Introduce yogurt cultures, which can be from a store-bought yogurt with live cultures or a yogurt starter culture.
- Incubate: Keep the mixture at a consistent temperature (around 110°F) for 4-10 hours. The longer it incubates, the tangier it will be.
- Refrigerate: Once set, refrigerate the yogurt to halt the fermentation process.
Making Homemade Kefir
Kefir is similar to yogurt but uses different cultures, resulting in a drink with a more liquid consistency and a broader range of probiotics. It’s fermented with kefir grains, a symbiotic culture of bacteria and yeasts.
Steps:
- Add Kefir Grains to Milk: Place kefir grains in a jar and fill it with milk, leaving some space at the top for expansion.
- Cover and Ferment: Cover the jar using a breathable material, like a cloth or paper towel, and let it ferment at room temperature for 24 hours.
- Strain and Store: Strain out the kefir grains, and your kefir is ready to drink. Store the grains in fresh milk for the next batch.
Health Benefits and Customization Options
Kefir and yogurt are both rich in probiotics to aid in your digestive health and boost the immune system. They are also an excellent source of calcium, protein, and B vitamins.
The beauty of making yogurt and kefir at home is the customization. You can adjust the fermentation time to suit your taste preference for tanginess. Additionally, you can flavor your yogurt or kefir with natural sweeteners, fruits, or spices, creating personalized and healthful variations. Homemade versions also tend to have higher probiotic content than store-bought ones, as they are fresher and less processed.
Essential Tools and Ingredients for Home Fermentation
Basic Equipment Needed
- Jars: Glass jars are the most widely used containers for fermentation. They come in various sizes, suitable for different quantities of fermented products. Ensure the jars are clean and sterilized to prevent unwanted bacterial growth.
- Weights: Fermentation weights are crucial to keep the produce submerged under the brine, creating an anaerobic environment essential for fermentation. You can use commercially available fermentation weights or clean, boiled stones.
- Thermometer: A reliable thermometer is essential, especially when fermenting dairy products like yogurt. It helps maintain the correct temperature, which is crucial for the growth of beneficial bacteria.
- Other Useful Tools: A few other helpful items include a wooden spoon for stirring, a strainer (for kefir), and pH strips for testing acidity levels.
Choosing the Right Ingredients
- Types of Salt: Salt is vital in vegetable fermentation. It’s advisable to use sea salt or Himalayan salt, as they are free from additives found in regular table salt. The mineral content in these salts can also add to the flavor profile of your fermented products.
- Water Quality: If you’re using a water-based brine, the quality of water is crucial. Chlorinated tap water can inhibit fermentation, so it’s better to use filtered or spring water.
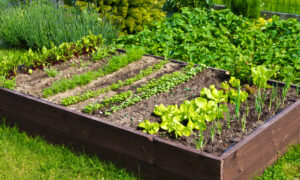
- Fresh Produce: Always opt for the freshest vegetables and fruits. Organic produce is preferred as it’s free from pesticides and other chemicals that may affect the fermentation process.
- Dairy for Yogurt and Kefir: For yogurt and kefir, use fresh, high-quality milk. The type of milk (cow, goat, or plant-based) will have an influence on the flavor and texture of the final product.
- Starter Cultures: For yogurt, you can use a small amount of store-bought yogurt with live cultures as a starter. For kefir, kefir grains (a combination of yeast and bacteria) are necessary.
Optional Additions
- Spices and Herbs: Adding spices and herbs can create unique flavor profiles in your fermented foods. Common additions include garlic, dill, mustard seeds, and chili peppers.
- Sweeteners for Flavoring: After fermentation, try adding natural sweeteners like honey or maple syrup to yogurt and kefir for additional flavor.
Simple Starter Recipe: Sauerkraut
Ingredients:
- 1 medium cabbage (about 2-3 pounds)
- 1-1.5 tablespoons of sea salt (non-iodized)
Equipment:
- A large mixing bowl
- A clean, quart-sized glass jar
- Fermentation weight or a smaller jar
- Cloth or coffee filter and rubber band for covering
Instructions:
- Prepare the Cabbage:
- Trash the outer leaves of the cabbage and set them to the side.
- Slice the remainder of the cabbage into quarters and remove the core.
- Slice the cabbage into thin strips.
- Salt and Massage the Cabbage:
- Toss the sliced cabbage in a large mixing bowl.
- Sprinkle the sea salt over the cabbage.
- Massage the salt into the cabbage with your hands for about 5-10 minutes. The cabbage will begin to soften and release liquid, creating a brine.
- Pack the Cabbage into the Jar:
- Tightly pack the cabbage into the glass jar, pressing it down to help release more liquid.
- Be sure the cabbage is fully submerged under the brine. If needed, top it up with a bit of water.
- Weigh Down the Cabbage:
- Place the fermentation weight or a smaller jar filled with water over the cabbage to keep it submerged.
- Cover and Store:
- Place a coffee filter or cloth over the jar top; secure it with a rubber band.
- Store the closed jar at room temperature, away from direct sunlight, for about one to four weeks.
- Check and Taste:
- Check the sauerkraut every few days, making sure the cabbage stays submerged.
- Taste it after a week; it should start to develop a tangy flavor. Leave it to ferment until it reaches your desired flavor.
- Store in the Refrigerator:
- Once the sauerkraut is to your liking, replace the cloth with a lid and store it in the refrigerator. It can be kept for several months.
Tips for Success:
- Keep everything clean: Ensure your hands, utensils, and containers are thoroughly clean to prevent bad bacteria from spoiling your sauerkraut.
- Salt-to-cabbage ratio: Too little salt can lead to spoilage, while too much can inhibit fermentation. Aim for about 2-3% salt by the weight of the cabbage.
- Submerge the cabbage: This is a crucial step to prevent molding. Be sure the veggie is fully submerged under the brine.
Troubleshooting:
- Mold on the surface: If you see mold, skim it off. If the sauerkraut beneath looks and smells fine, it’s still good.
- Sauerkraut isn’t fermenting: Check if it’s too cold or if you used too much salt. Room temperature is ideal for fermentation.
- Too mushy: This can happen if the cabbage was over-massaged or fermented too long. Next time, massage less and check the texture more frequently.
Safety Tips in Home Fermentation
Understanding the Basics of Fermentation Safety
Fermentation is a relatively safe process, especially when you follow basic hygiene and safety guidelines. The naturally acidic environment of fermentation is generally inhospitable to harmful bacteria, but it’s still important to be aware of certain safety practices to ensure successful and safe fermentation.
1. Cleanliness is Key
- Always begin by fully washing your hands, all utensils, and work surfaces. Use hot, soapy water to clean everything that will come in contact with your fermentation project.
- Sterilize your fermentation jars and equipment. You can do this by boiling them in water for a few minutes or using a dishwasher with a sterilization cycle.
2. Use the Right Salt
- Use non-iodized salt like sea salt or kosher salt for fermentation. Iodized salt can inhibit the growth of good bacteria and affect the flavor of your fermented foods.
3. Keep an Eye on Temperature
- Most vegetable fermentations do well at room temperatures between 65°F and 75°F. Too warm, and you risk unwanted bacterial growth; too cold, and fermentation may not occur effectively.
4. Ensure an Anaerobic Environment
- Make sure your food is fully submerged under the brine to create an anaerobic (oxygen-free) environment. This prevents the growth of mold and harmful bacteria. Use a fermentation weight or a clean, smaller jar filled with water to keep the food submerged.
5. Trust Your Senses
- When checking your fermentation, trust your senses. If something smells unpleasant or off, it’s better to err on the side of caution and discard it. The same goes for visible mold – if you see mold on the surface, it’s best to throw away the batch.
6. Be Aware of Cross-Contamination
- Avoid any risk of cross-contamination by using separate utensils for different fermentation projects or thoroughly cleaning them between uses.
7. Label and Date Your Ferments
- Keep track of when you started your ferment and what it contains. This helps you monitor the fermentation process and ensure you don’t forget about a batch.
8. Start Small
- If you’re new to fermentation, start with small batches. This way, you can experiment and learn without wasting large amounts of food if something goes wrong.
9. Research and Educate Yourself
- Read up on the fermentation process of the specific food you are fermenting. Different foods may require different techniques and safety considerations.
Conclusion: Embarking on Your Fermentation Journey
As we wrap up this introduction to the world of home fermentation, I hope you feel inspired to start your own fermenting adventure, beginning with the simple yet delightful process of making sauerkraut. Remember, fermentation is as much an art as it is a science; it invites you to engage with your food in a meaningful and interactive way. Your first batch of homemade sauerkraut is not just a culinary project but a step into a world of enhanced flavors, health benefits, and sustainable living.
I encourage you to embrace the process with curiosity and patience. Don’t be afraid to experiment, and trust your instincts. As with any new skill, practice makes perfect, and the world of fermentation is forgiving and flexible. The joy of tasting your homemade sauerkraut, knowing you transformed simple ingredients into something so vibrant and alive, is truly unmatched.
Looking ahead, our fermentation journey is just beginning. In future posts, we’ll delve deeper into the fermenting universe, exploring a variety of recipes and advanced techniques. We’ll uncover the secrets of fermenting different vegetables, dive into the effervescent world of fermented beverages like kombucha and kefir, and even explore international fermenting traditions that bring a unique twist to your kitchen.
So, stay tuned and get ready to expand your culinary horizons with more fermentation magic. Whether you’re a seasoned fermenter or just a curious beginner, there is always something new and exciting to discover in this fascinating world.
Happy fermenting, and here’s to the many batches of delicious, healthful, and environmentally friendly foods that await you!